
5 edible holiday gifts:
Five delicious homemade gifts made with nutrient dense ingredients and lots of love that are sure to please your recipients.
Finding the right gift is no easy task, but there is one thing that is certain to delight anyone: food. For many of us, food joins us with those that we care for and represents love, dedication, and comfort. Give your loved ones a taste of holiday cheer and a delicious symbol of your adoration by consulting the recipes below!
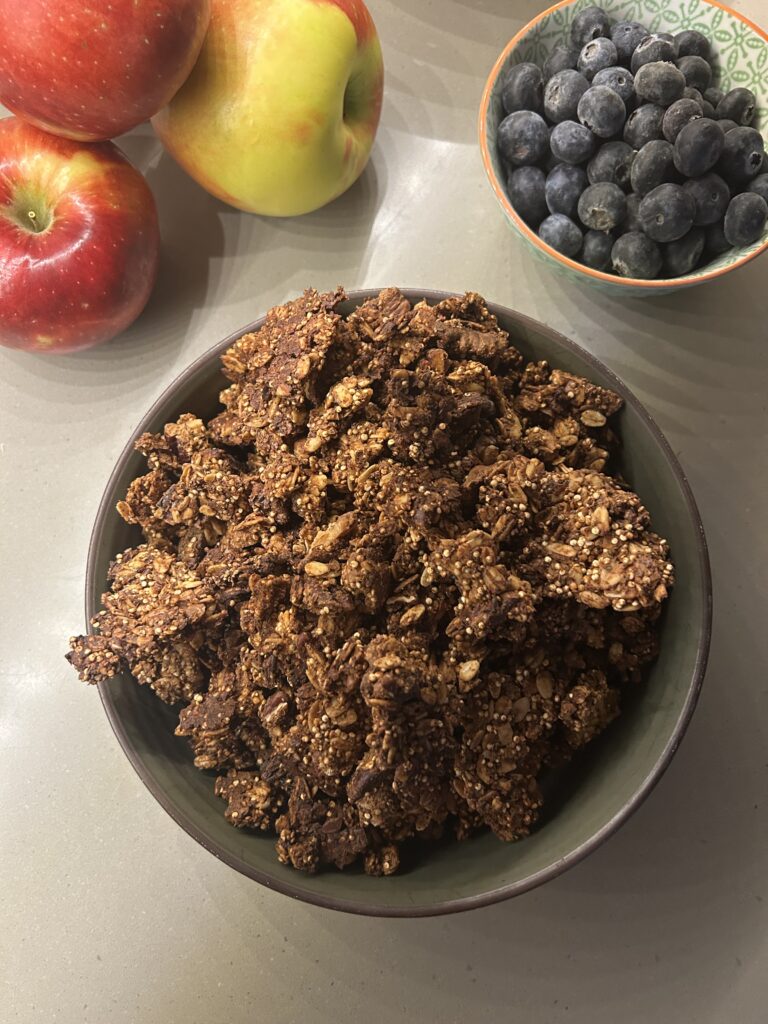
Homemade Granola
This crunchy granola is a wonderful shelf-stable gift that is easy to make and easy to customize! The vegan, refined-sugar and (optional) nut-free formula makes it a suitable gift to nourish all varietes of people. The base is made with a combination of oats and quinoa that support energy levels and balance blood sugar. The addition of chia and flax seeds help to bind the mixture together, creating a slab-like product and adding a boost of fiber & omega-3s! Various nuts, seeds, dried fruits, and chocolate chips are delicious inclusions to modify this recipe to your recipient’s preference. The perfect mixture to satisfy and support someone you love. Pack the finished granola into jars or bags, tie on a bow, and you’ve made an irresistably tasty present brimming with goodness!
Recipe:
Add-ins: choose amounts to suit your preferences!
- Shredded coconut (unsweetened)
- Raw nuts (cashews, almonds, pecans, walnuts, etc;), roughly chopped- can also chop finely for larger clusters, but you lose texture.
- Seeds (pumpkin, hemp, sunflower, etc;)
- Chocolate chips (can add before or after)
To add AFTER baking:
- Dried fruits (cranberries, cherries, apricots, etc;)- if possible, no sugar added.
Recipe makes: 1 half-sheet pan, approximately.
INGREDIENTS:
1 chia egg (1 tbsp chia seeds + 3 tbsp water)
⅓ cup loose nut or seed butter (or use ¼ cup coconut oil)
⅓ cup maple syrup or honey
1 tsp vanilla
1½ cups rolled oats
½ cup uncooked quinoa
¼ cup ground flaxseeds
¾ cup add-ins (see above, or anything else you can think of!)
2 tsp cinnamon
- Preheat the oven to 350 degrees. Prepare a half- baking sheet with parchment paper or a silicone baking mat.
- In a small bowl, combine the chia seeds and water. Let the mixture sit for at least 10 minutes, stirring occasionally.
- In a large bowl, add the sweetener, nut butter, vanilla extract, and chia egg, stirring to combine. Add all other ingredients to the mixture and incorporate until everything is completely coated.
- Transfer mixture to the prepared pan and flatten into an even layer. Place in the oven and bake for 25-30 minutes, stirring halfway through before re-flattening.
- Remove from the oven and let cool completely before breaking into large clusters. Package in an airtight container and store in a cool dry place for a maximum of 6 months.
Homemade Nut Butter
A unique homemade gift to expand someone’s nut butter horizons. Experiment with different nut varieties and flavorful add-ins to create a versatile spread for all occasions. I enjoy consuming it as a toast topper, spread onto apple slices, or simply by the spoonful. Not to mention the unrivaled nutritional properties of nuts, forming a butter packed with vitamins, minerals, protein, healthy fats, and antioxidants that check every box on the body’s wish list. The ultimate gift to satisfy nutritional requirements and someone’s taste buds!
This recipe requires a good food processor to achieve a creamy texture, but don’t be alarmed if it doesn’t develop a smooth texture straight away. The process has four stages: whole nuts, meal, clumps, and then a smooth butter. While making the butter, the friction created during the blending process may cause the spread to exert heat. If this happens, simply wait a couple of minutes for the mixture to cool and begin processing again.
INGREDIENTS:
Makes about 1 ⅔ cup (16 oz), the equivalent amount of a store bought jar
3 cups Nuts & Seeds of your choice: Raw Almonds, Hazelnuts, Peanuts, Pecans, Pistachios, Sunflower seeds, etc;
Optional Add-Ins:
¼ tsp Salt
½ tsp Vanilla Extract
¼ tsp Cinnamon/Spices
1 tbsp Cacao Powder
1 tbsp Coconut or Date Sugar
Flavor Ideas:
Homemade “Nutella”- 3 cups hazelnuts, ¼ cup (or more if desired) melted dark chocolate
Pistachio Creme- 3 cups pistachios, ½ cup melted white chocolate
Cookie Butter- 1½ cups almonds, 1½ cups cashews, 2 tbsp coconut or date sugar, 1 tsp vanilla extract, and spice blend: 1 tsp cinnamon, ½ tsp ground ginger, ¼ tsp cloves, ¼ tsp nutmeg, generous pinch of salt.
To Make:
- Roast your nuts
- Preheat oven to 350*F
- Place nuts on a baking sheet and roast for about 6-12 minutes, or until fragrant and browned slightly.
- Cool until warm to the touch (oxymoron of the day!), not hot.
- Place nuts in a food processor and blend until they release their oils to form a smooth, creamy product, scraping down the sides as necessary. It may take as many as 12 or more minutes to fully process the nuts, so set aside time to complete this project. If it doesn’t look right, keep blending; during the blending process, the nuts will transition from whole, to a mealy texture, to clumps, to a creamy butter.
- Once smooth, blend to incorporate all flavoring ingredients (salt, spices, etc;) and transfer to a clean jar. Tie on a bow and share with someone you care about (or treat yourself)! To preserve the contents, store in a refrigerator for up to 1 month.
Seed Crackers
Wholesome ingredients combine to create an addictively crispy product perfect for dipping, dunking, or munching. Made with just a few varieties of seeds, spices, and a bit of salt, these are the perfect gift to deliver a satisfying crunch and a boost of nutrients. They are excellent served as vehicles for a flavorful dip, various cheeses, or on their own. These crackers are sure to please anyone who receives them, but be warned that you won’t want to share them!
INGREDIENTS:
Makes 1 sheet pan- double if you are giving them to many people!
1 cup flaxseeds
¾ cup pumpkin seeds (pepitas)
¾ cup sunflower seeds
½ cup hemp seeds
1¼ cup boiling water (add 1 tbsp more at a time if flaxseed mixture is too thick)
1 tsp salt (+ flaky salt for finishing if desired)
½ tsp each of spices (optional; I like onion/garlic powder & paprika)
- Preheat oven to 350F
- Add the water and flaxseeds to a large bowl, stirring to combine. Let sit for 10-15 minutes, stirring every 5 minutes, to allow the seeds to absorb the water, forming a jelly texture similar to egg whites. Add more water if the mixture seems too thick or the water absorbs too rapidly.
- Combine the seeds with the gelled flaxseeds and incorporate any desired seasonings.
- Line a half sheet baking pan with parchment paper and lightly brush with olive oil. Transfer the mixture to the sheet and spread into a thin, even layer, ensuring to cover the entire surface. If you are experiencing difficulty with the seeds sticking to your spreading device or hands, lightly cover them with oil and continue. Brush a bit more oil on top of the flattened mixture and sprinkle with flaky salt.
- Bake 25-35 minutes, depending on the thickness of your crackers.
- Remove and let cool completely to allow the crackers to obtain their crunch.
- Snap the crackers into large shards and they are ready to be enjoyed! I recommend packing these within a box and tying on a pretty ribbon before giving them to a lucky recipient (or eat them all yourself). These keep well in a cool, dry place for a couple of months.
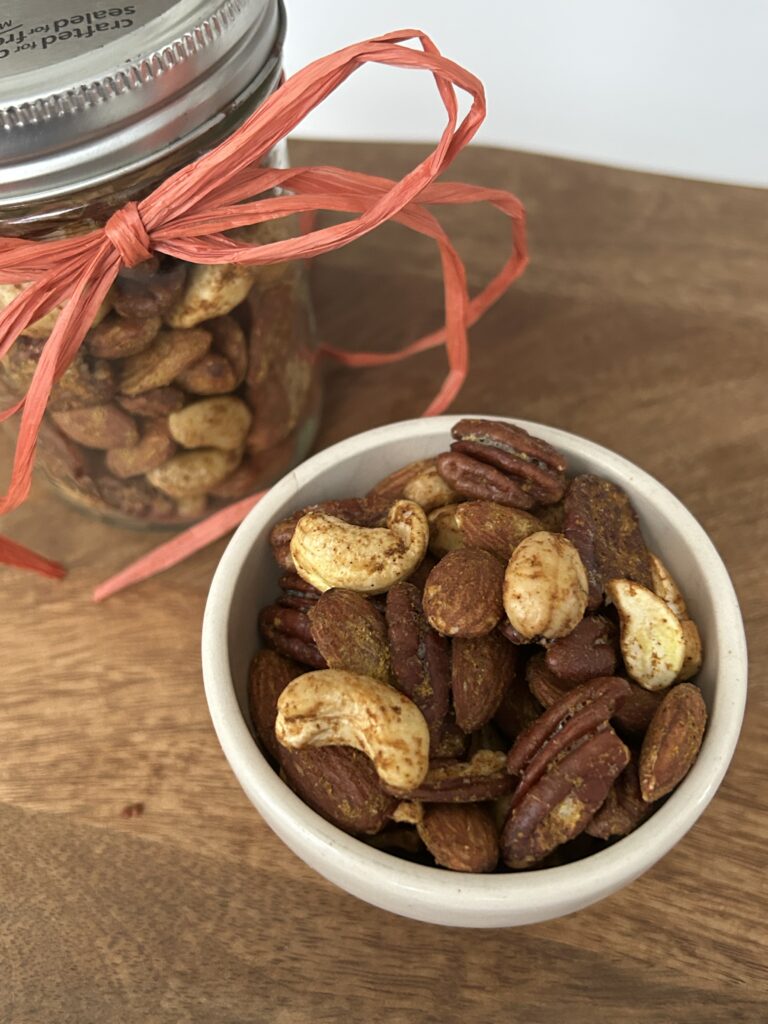
Seasoned Nut Mix
Packed with healthy fats and various vitamins, nuts pack a punch of nutrition during times when sugary treats are plentiful and cookie consumption levels reach their peak. A humble roasted nut medley is the perfect thing to nibble at to restore balance. This recipe is easily customizable to suit different preferences, boasting a plethora of possible spice & herb flavorings beyond the given blends below. Nutritious, delicious, and simple to create, this nut mix is the perfect gift to replenish an empty snack cupboard during the holiday season.
INGREDIENTS:
- 6 cups of RAW mixed nuts
- 2 large egg whites
- 2 tablespoons water
- Option #1: Warming Spice
- 1 teaspoon cumin
- 1 teaspoon chili powder
- 1 teaspoon curry
- 2 teaspoon salt
- ½ teaspoon garlic powder
- ½ teaspoon ginger
- ½ teaspoon cinnamon
- Option #2: Garlic and Herb
- 2 tbsp chopped rosemary (fresh)
- 2 teaspoons dried thyme
- 2 tsp garlic powder
- 1 tsp smoked paprika
- 1 tbsp salt
- Option #3: Maple Cinnamon
- ⅔ cup maple syrup
- 1 tbsp cinnamon
- 1 tsp salt
- 1 tsp vanilla extract
Recipe:
- Preheat oven to 325*F and line a whole baking sheet or 2 half sheets with parchment or a silicone mat.
- In a small bowl, separate the egg whites from the yolks and allow them to puddle in the bowl. Add the water and whisk vigorously until the mixture becomes slightly foamy.
- In a large bowl, mix together the nuts and stir in the egg white mixture. Toss the nuts until fully coated by the egg whites.
- Add in the ingredients of your chosen seasoning and stir until the nuts are evenly coated. Pour onto your prepared baking sheet.
- Place the sheet into the oven and bake for 20 minutes, stirring halfway through.
- Let the nuts cool completely before packaging them in whatever fashion you choose (I prefer mason jars with a bow!). These store well for two months (though they’ll be eaten before then!).
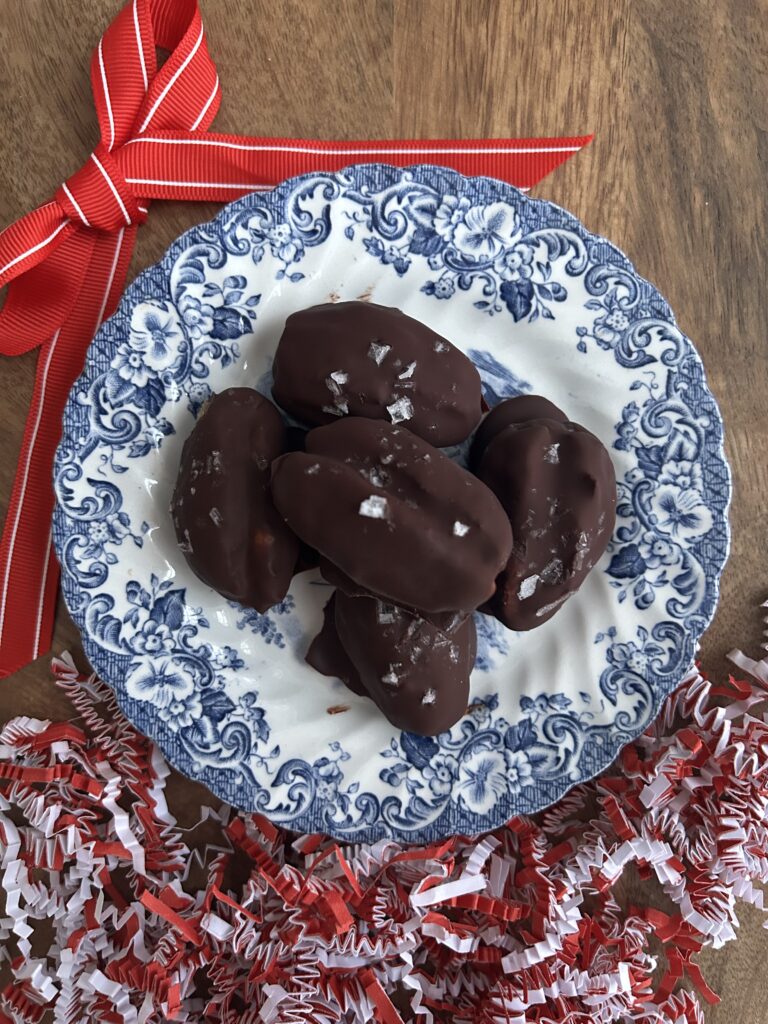
Chocolate Covered Dates
Chocolate covered dates are the perfect treat to add to someone’s holiday dessert array. Their caramel-like sweetness and chewy texture pairs wonderfully with a nutty filling and rich chocolate coating- a decadent treat with many benefits! Dates are a good source of magnesium, copper, and vitamin B6, as well as fiber to improve gut health. Paired with nut butter rich in healthy fats and protein, plus chocolate for added nutrients and enjoyment, this dessert is a nourishing way for someone to enjoy something sweet!
This recipe is incredibly easy to make and only requires a couple of ingredients:
- Chocolate chips/chopped bar: Any type of chocolate will work here- white, milk, dark- depending on your recepient’s preference (or your own ;). Personally, I prefer using dark chocolate to avoid an overpowering sweetness. If it is in your budget, I highly recommend choosing a brand that sources their cacao sustainably and refrains from using unnecessary additives. Also to note, the only difference with using a bar is the greater variety of choices and increase in quality.
- Medjool Dates: Medjool dates, the most widely available variety of dates, are the perfect stuffing size and possess the characteristic caramely flavor that works best with this recipe. Pitted dates are convenient if you are short on time, but buying an unpitted variety helps them retain their plumpness and rich texture. Most grocery stores carry Medjool dates, or visit your local international/Mediterranean grocery for a wider selection..
- Nut or seed butter: Any variety of spread will suffice, but my favorites are peanut, almond, or pistachio butter. If possible, choose a variety without added sugars, as the dates and chocolate are already a sweet duo. Texture doesn’t matter in this instance, though a thinner product may be messier.
- Flaky Sea Salt: This is the cherry on top! A sprinkle of sea salt onto each date helps to accentuate the flavors of each element.
INGREDIENTS:
- 10 Medjool dates
- 10 tsp nut butter
- ¾ cup chocolate + 1 tsp coconut oil
- Hefty pinch of flaky salt (in total)
Recipe:
- Line a cookie sheet or plate that fits into your freezer with parchment paper to place the finished dates on later.
- Gather your dates and pit them, if necessary, by slicing into the flesh and carefully pulling out the seed. Push the sides outwards slightly, opening them enough to easily add a filling, while attempting to maintain their structural integrity (do not flatten or stretch too wide).
- Fill each date with a teaspoon of nut butter and gently push the sides together again. If your nut butter is quite loose, be wary that an overfilled date may leak into the chocolate while being coated, so add just enough that you can fully close the date again.
- Now, melt the chocolate. In a double boiler or bowl, add your chocolate morsels and a heaping teaspoon of coconut oil. Place either container over a saucepan or pot of boiling water, reduce the heat to low, and stir the chocolate until it is fully melted. For ease, you may also put the chocolate into a microwave safe bowl, melting at 15 second intervals while stirring in between, until melted and smooth.
- Drop the dates in the chocolate, efficiently rotate them in the mixture, and, using a fork, carefully lift them from the chocolate onto your prepared plate or baking sheet. Repeat the process with all of your filled dates. Once finished, sprinkle a generous pinch of sea salt over top of the covered dates so that each one is sufficiently seasoned (do NOT skip this step, you’ll miss the difference in flavor!).
- Stick the platter of dates into the freezer to allow the chocolate to set for 20 minutes. To store, place in an airtight container and refrigerate until you are ready to gift them! These dates will keep for a week in the refrigerator, or 1 month in the freezer (thaw slightly before eating or you risk frozen teeth!)
recent comments: